STAMPtember just got a whole lot CHEESIER!

IMG_4800

Hello friends! As I’m sure you all know, Simon Says Stamp is currently hosting STAMPtember all month long on their site. They not only have awesome sales and specials, but they also have exclusive releases.

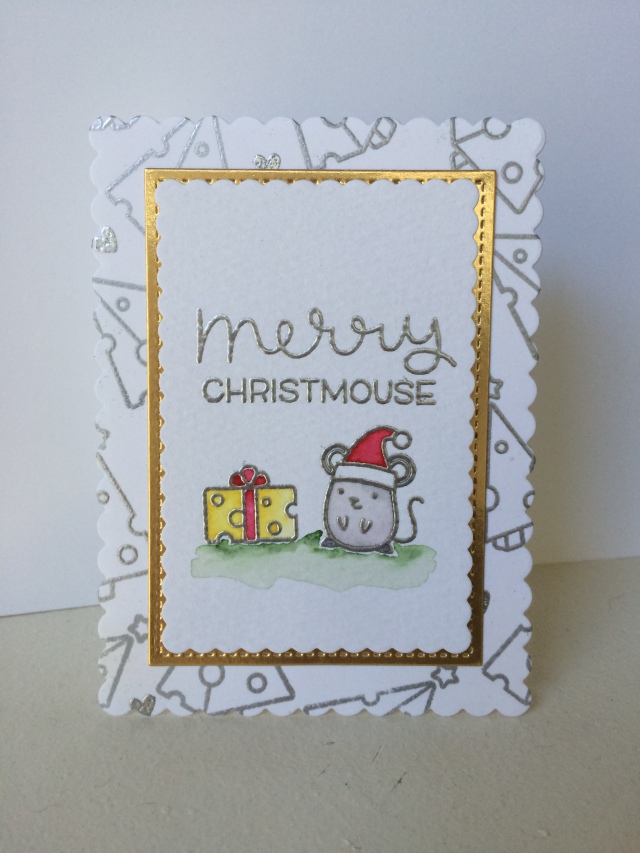
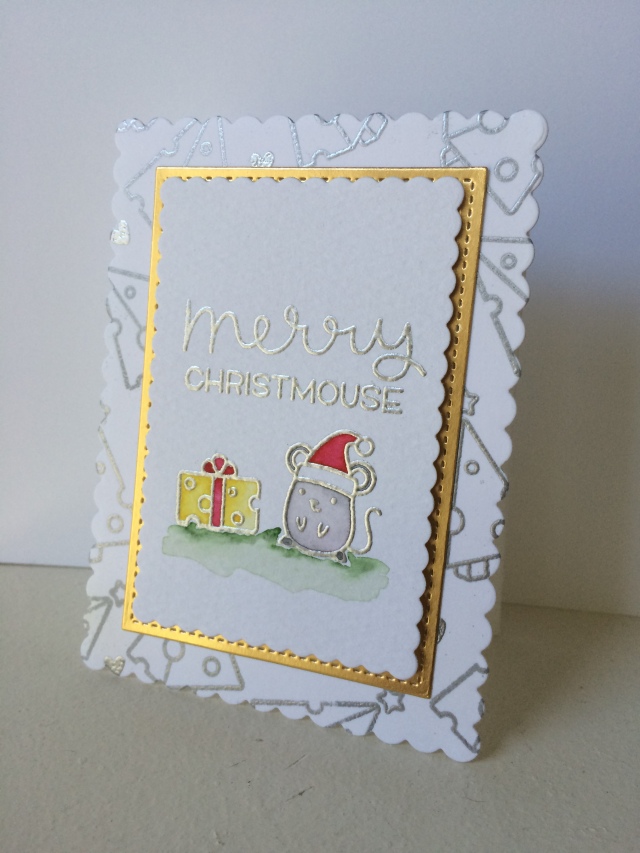
Lawn Fawn teamed up with Simon to create one of the cutest Christmas sets I’ve ever seen! The set is called Merry Christmouse and filled with fun, cuteness, and lots of cheese. 🙂

IMG_4799

For this card, I used the Merry Christmouse set to heat emboss a background using Hero Arts Silver Embossing Powder. I also silver heat embossed my cute mouse scene on a piece of Tim Holtz Watercolor Cardstock with the same embossing powder.

Do you love the scalloped borders? Those are one of Lawn Fawn‘s newest stand-alone die sets called Scalloped Rectangles. It is a huge set that comes with TONS of sizes… a definite MUST HAVE.

The gold piece is a foiled cardstock from DCWV that i cut with one of Lawn Fawn‘s Stitched Rectangles. I just love how a super cheesy set like this can be called elegant as well.

Make sure you get you hands on this set, because it will sell out!!

SUPPLIES:

Jurassic Park Inspired Cards!

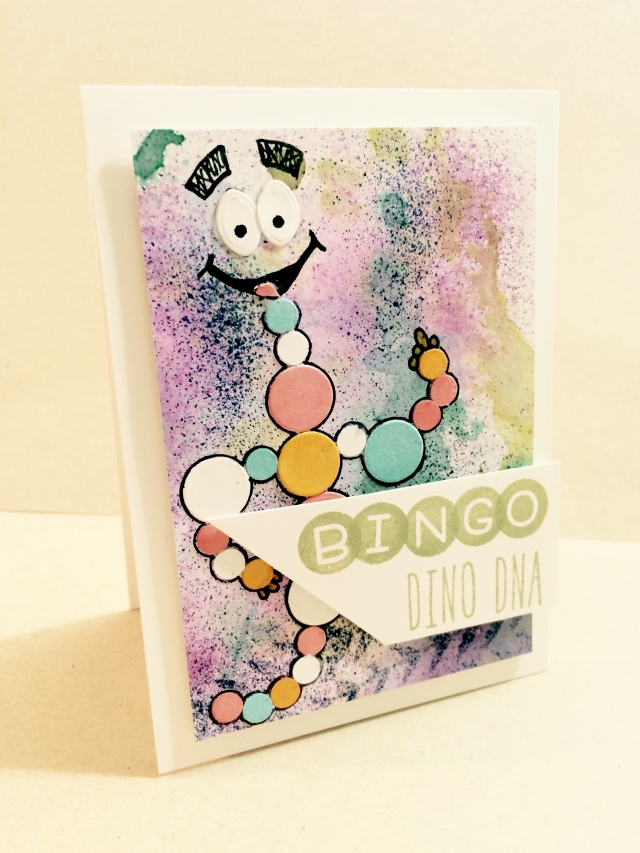
Bingo Dino DNA card

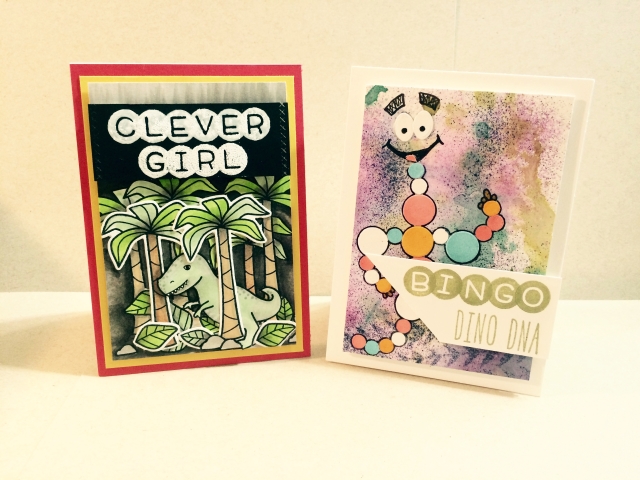
Hello, John! Is no one else as excited for a new movie in the Jurassic Park franchise as I am?! Not only are the two cards I made super cute, but I made a video in a completely different format. I’m trying something new, trying to figure out my niche on YouTube and in card making, and I really hope you like it. Please watch, please subscribe, and PLEASE let me know what you think!

This guy would even have looked super fun on a plain colored background! Doesn’t everyone love the most educational part of the movie?!

Jurassic Park Cards

Check out both of my Jurassic Park inspired cards on my Instagram! KristinBFiore

Thank you so much for tuning in!

Fawny Holiday Week Watercolor Video and Hanukkah Card

IT. IS. HERE….

unnamed

My first Lawn Fawn video has magically appeared this holiday season, and I really hope you love it! I’m not even going to describe it… just watch! Be amazed! Enjoy!

What did you think?!

3

My second card featured on the Lawn Fawn Blog today is a simple Hanukkah card. I first used some Tim Holtz Distress Inks in various shades of blue to make the ombre background. I cut it with the largest die from the Small Stitched Rectangles Lawn Cuts and used the Happy Hanukkah Stamp Set to heat emboss the menorah and sentiment in Ranger Liquid Platinum Embossing Powder. I took a Neenah 110# Solar White card base and stamped the Star of David in Simon Says Stamp Soft Navy Ink around the edges. I popped up the rectangle card front with some 3M Foam Adhesive and that was that! Beautiful!

I really hope you’re enjoying the holiday inspiration, and let me know what you think of my first video!

Check out the Lawn Fawn Blog for more!

SUPPLIES:

Fawny Holiday Week Shaker Card and Watercolored Ornaments Card

Today is Day 2 of Lawn Fawn’s Fawny Holiday Week, and today I have 2 awesome cards being featured! 1

First up is this super simple shaker card! I used the tree from Lawn Fawn’s Trim the Tree Lawn Cuts as my shaker image. I put in an assortment of Lawn Fawn sequins, and dipped the star and Scripty Joy Lawn Cut onto my Golden Glitz Delicata Ink Pad and then covered them both in two layers of Ranger Super Fine Clear Embossing Powder.  I just love how simple, elegant, and fun it tuned out!

2

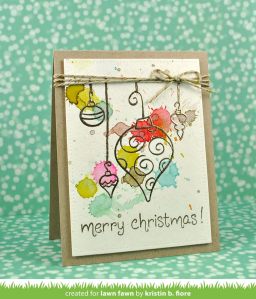
I’m sure you all know how much I love watercoloring. For this card, I heat embossed various ornament images from Lawn Fawn‘s Ornate Ornaments Stamp Set with some Ranger Liquid Platinum Embossing Powder on some Tim Holtz Watercolor Cardstock. I then used a medium watercolor brush, dipped it in Crushed Olive, Pumice Stone, Broken China, or Picked Raspberry Distress Inks, dunked the inked brush in water, then held it high above my project so it dripped and made a watery splash! To finish this card, I heat embossed the sentiment in the same embossing powder, used the Large Stitched Rectangles Lawn Cuts to cut out the panel, adhered it to a Neenah Desert Storm card base, and lastly tied some of Lawn Fawn‘s Gold Sparkle Lawn Trimmings into a bow at the top. I really like how the ornaments look like they’re hanging from the Lawn Trimmings.

Check out the Lawn Fawn Blog to see the other beautiful cards from the Fawnies!

SUPPLIES:

COPIC Markers for Card Makers: Card inspired by Debby Hughes

IMG_2348

If you have been following my Instagram, you are aware that I am completely obsessed with the COPIC Markers for Card Makers class from Online Card Classes. Today was the first day I really got to spend some time making a whole card, and I’m so excited to have tried something completely new, but right up my alley at the same time.

Debby Hughes was a guest today, and I was so inspired by her watercolor/mixed-media-like styled cards.

IMG_2347

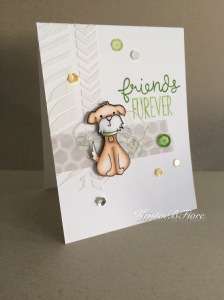
For my card, I used one of the classes practice images that is actually from Lawn Fawn‘s Critters in the Burbs Stamp Set. I colored it using the technique Debby showed (I highly recommending signing up for the class – if you haven’t already – to access this technique video as well as MANY others), then I cut it out using some precision scissors, and fixed my edges with a black felt tip marker.

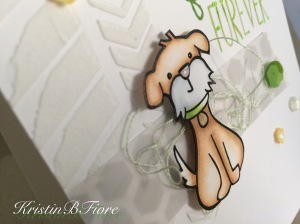
I used a piece of Neenah Solar White 110# Cardstock, the Tim Holtz THS024 Chevron Layering Stencil, and some Wendy Vecchi White Embossing Paste to make an imperfect strip of texture coming from the top left of my card. After allowing it to dry completely, I cut a 1” Strip of Studio Calico {Hex} Vellum, ripped the long end to my desired size, and adhered it with a little but of Studio Multi Medium Matte. I NEEDED to use this sentiment from the Feathered Friends STAMPtember collaboration of Lawn Fawn And Simon Says Stamp! It says “friends forever,” but with ‘selective-inking’ I made it say “friends furever.” I grabbed a strand of light green thread and crumbled it up – I added some foam squares to the back of my puppy image and adhered it down over the thread to hold it in place. Lastly, I embellished my card with some Lawn Fawn sequins from some past collections.

IMG_2349

I really LOVE how this card turned out, and I would encourage everyone to try something new whenever they need some inspiration!

SUPPLIES:

Let’s Get Creepy with Perfect Paper Crafting

Attachment-1 (1)

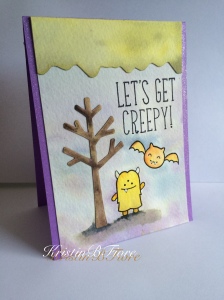
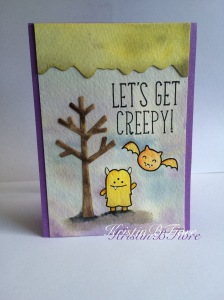
Today I have this adorable card for you using the Perfect Paper CraftingPerfect Tears” tool and some of Lawn Fawn’s newest products.

IMG_2291

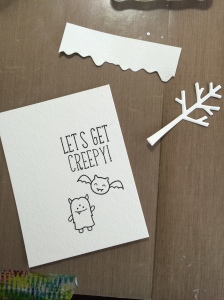
I started out with some Strathmore Watercolor Paper. I stamped my images from the Monster Mash Stamp Set and the Spooktacular Stamp Set, as well as my adorable sentiment using the Violet’s ABCs Stamp Set. Then I die cut the tree from the Sweater Weather Lawn Cuts and used the Perfect Tears “Course Deckle Edge” to create a gooey border. I did use a small pair of precision scissors to clean up the edges from the tear just a bit.

IMG_2293

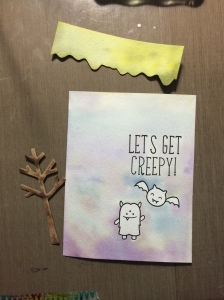
The next part is always my favorite…. WATERCOLORING. For this card, I used some of my Distress Ink Minis. For the background I used Pumice Stone, Stormy Sky, and Dusty Concord – for the ooey gooey border I used Crushed Olive, Forest Moss, and Peeled Paint – and for the tree I used Frayed Burlap, Gathered Twigs, and Walnut Stain. I let all of those dry completely before painting the monsters.

For the monsters – I used Spiced Marmalade and Mustard Seed, then I added some Pumice Stone and a tiny bit of Black Soot under the fury monster and tree to give them some ground to stand on. Once everything was dried I used my Tombow Stamp Runner to add adhesive to all of the pieces and adhere them in place. Lastly, I made my card base out of some purple cardstock and ran my Wink of Stella Glitter Brush along the two long sides to give it some shine.

IMG_2306

So easy and so cute, right?!  I hope you enjoyed this fun, creepy card! Please let me know if you have any questions or comments! Have a great day and thanks for reading!!

For supplies, please click on the links throughout this post. I’ve been having some trouble using InLinkz and will put up a proper supply list once I get back on track.

Technicolored Tuesday – Tie Dye Background Technique

I am so excited to be sharing my first brand new technique card!  I am starting a series called “Technicolored Tuesday.” I am very aware that it is now Wednesday, but I was not prepared for how much work goes into creating a video! WOW! I have even more admiration for the ladies I watch all the time. Hopefully, from now on my Technicolored Tuesday blogs will be on time!

Here is the link to the video… FINALLY!

And here is the super cute end product card!

IMG_7751

Now let’s get into it…

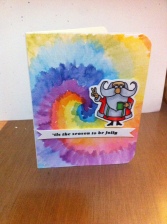
I used Tim Holtz Distress Watercolor Cardstock and created this fabulous Tie-Dye background by using a rainbow of Tim Holtz Distress Markers (Barn Door, Spiced Marmalade, Mustard Seed, Mowed Lawn, Salty Ocean, Chipped Sapphire, and Seedless Preserves). You need to create a swirled background, but there is no perfection in this technique. Sometimes the messier the better and more authentic it looks.

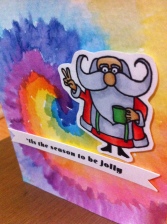
I then used a Digital Stamp from Jane’s Doodles called Santa Peace and colored him with some COPIC Markers. Looking back, I wish I would have made him a little bigger, but having the card vertical instead of horizontal made a big difference.

IMG_7748

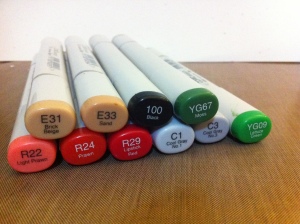
I used E31 and E33 for his face and hands, C1 and C3 for his hair, beard, fur lining, and white undershirt, R22, R24, and R29 for his coat and pants, YG09 and YG67 for his mug and suspenders, and lastly 100 for his boots. I love the way he turned out and I think he just looks perfect.

 IMG_7750

Elizabeth Craft Designs Ornament Card with Distress Markers

Hi everyone! I’m absolutely obsessed with this beautiful card I made using a sticker set from Elizabeth Craft Designs.

Image

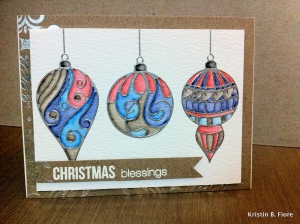
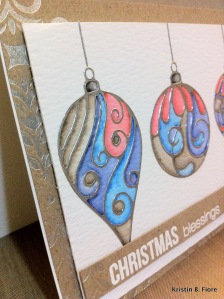
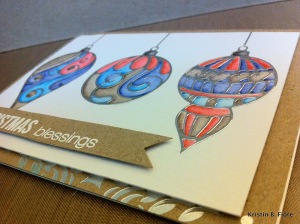
I first created the ornament piece for the card-front. I started with a 3.75×5 piece of Tim Holtz Distress Watercolor Cardstock because I knew I would be watercoloring inside of the stickers. I then chose three different ornaments from Elizabeth Craft Designs Christmas Ornaments Peel-Off Stickers in silver and aligned them along my panel.

Image

I used four different Distress Markers: Walnut Stain, Barn Door, Chipped Sapphire, and Salty Ocean to watercolor the three images. I love how this color combination turned out! To me, it looks very modern, but timeless – which is what I strive for in every card. The sticker pack also came with little silver lines, which I placed above the ornaments so they appeared to be hanging.

Image

I then pulled out my DCWV 6×6 Foiled Elegance Paper Stack, picked a gorgeous kraft paper with silver foil elements, and cut it down to a 4.5×5.25 panel. I used a sentiment from the Simon Says Stamp Christmas Sentiments Clear Stamp Set on a scrap from the foil paper and heat embossed it with some Hero Arts White Embossing Powder.

Lastly, I put all the pieces together! I adhered the DCWV panel to a Neenah Solar White A2 card base with my Tombow Stamp Runner. Then I used 3M Foam Adhesive on both the ornament piece and sentiment piece.

Overall, I think this card is just so beautiful. It is so easy to color cards in this way. Elizabeth Craft Designs Peel-Off Stickers are perfectly made for this technique because going out of the lines is practically impossible!

SUPPLIES:

Making the Most Out of One Stamp

As my very first post, on my very first blog, I wanted to showcase something that all crafters appreciate: GETTING BANG OUT OF EVERY BUCK!

Image

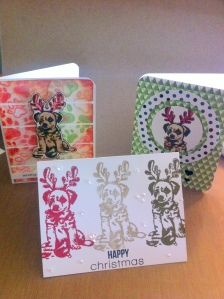
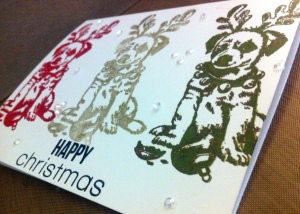
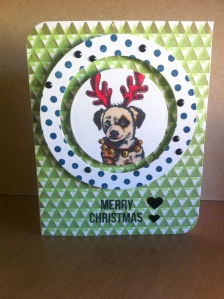
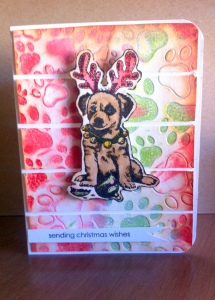
In these cards I showcased the extremely cute Holiday Puppy Wood Stamp by Inkadinkado. You still have to love him even though he broke your ornament!!! It is important to use your stamps in multiple ways with multiple techniques to justify spending upwards of $10 on one single stamp.

Image

Image

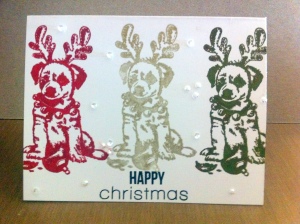
This stamp offers so many possibilities for holiday cards.  The first card is so easy to replicate too.  I stamped the puppy three times in different Hero Arts Shadow Inks – Red Royal, Gold, and Forever Green.  I have them in the Hero Arts Christmas Cube Ink Set which is the format I have most of my Hero Arts Shadow Inks.  You can re-ink them and I find them easier to handle when I am trying different techniques. It also does not hurt that they are much more cost effective for me in the cube form.  I was going to keep this card on the extremely simple and classic side, but while stamping I got a pretty big red ink mark in between the red and gold puppies so I decided to use some tiny cupped sequins to try and cover my mess. Obviously, it does not look perfect, but the sequins definitely helped while adding a little dimension and shine to the card.

Image

Image

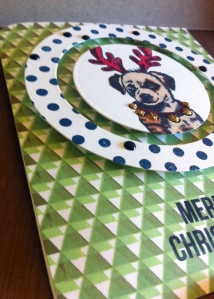
The next card is so fun to make because it uses a bunch of different techniques! For this card I stole my inspiration from a blogpost by Jennifer McGuire where she used this same Hero Arts Tiny Flags Background Stamp and “double-stamped” it in two different colors to get a different look to the background.  I’m absolutely obsessed with this technique and I know I’ll be using it with a bunch of my other background stamps.

I also used another background stamp to create the circle frame around the puppy’s face.  I stamped the Polka Dot Background Stamp by Inkadinkado in Memento Luxe Nautical Blue and heat embossed it with some Hero Arts Clear Embossing Powder.  I then diecut the puppy’s face as well as the circle frame using some of Spellbinder’s Standard Circle Nestabilities dies and attached them to the flag background piece with some 3M Foam Adhesive to give a little dimension.  As a final touch, I accented some of the embossed blue dots with some Black Enamel Accents and the bells with Champagne Stickles.

Image

Image

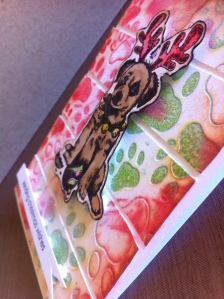
My final card uses products that I use on the daily! For this card I colored the puppy with Distress Markers on Tim Holtz Distress Watercolor Cardstock and cut him out with a little bit of a border.  I then inked up my Darice Paw Print Embossing Folder with Barn Door and Mowed Lawn Distress Ink Pads and ran it through my Sizzix BIGkick Machine. I then took some Tea Die Distress Ink and blended it into the puppy and edges of the paw print background to give them both a more “Tim Holtzy” look. I cut my background into strips and then applied them to the card so you can see the white underneath.

For all of these cards I used sentiments from the Simon Says Stamp Christmas Clear Stamp Set and Neenah Solar White Cardstock.

I can still think of more and more ways to make use out of this one little puppy, but I really hope you enjoyed the three cards I shared.  I also hope you are a little more tempted to use those stamps you buy for more than one or two projects. Never forget: the possibilities are endless!!!

SUPPLIES: